DockerでRuby on Rails6の環境構築
カタカタジムを運営・開発していますタカモリです。 今回はDockerでRubyOnRailsの環境を構築していきたいと思います。 なおRubyは初心者です!
環境
. MacOs BIg Sur(11.5.2) . Docker 20.10.8 . mysql 8.0.26 . ruby 3.0.2 . rails 6.1.4.1
作業ディレクトリを作成
それでは早速作業を始めます。 僕が初心者の時には「作業ディレクトリ」の意味がわかりませんでした笑
作業ディレクトリとは単に自分の好きな場所に好きなディレクトリを作成するという意味のみなのですが一応記載しておきます。
以下のコマンドで、railsappというディレクトリが作成されると思います。
$ mkdir railsapp
続いて、このディレクトリ内に、railsの環境を構築していきます。
今回はDockerコンポースを利用していきますが、複数のDockerコンテナを一度に操作するイメージと僕は思ってます。
railsapp
  - Dockerfile
  - docker-compose.yml
  - Gemfile
  - Gemfile.lock
横並びにするとわかりにくいですが、
- DockerFileはDockerイメージをつくる為に必要なもの
- docker-compose.ymlは複数のコンテナを一度に操作する為のもの
- GemfileはRailsをインストールする為に必要なもの
- Gemfileでインストールされたものが記述されていく
こんなイメージでしょうか。 それでは、用意もできたと思いますので作成していきたいと思います。
Gemfile
Railsの最新版は現在のところ6.1.4みたいですね。
source "https://rubygems.org"
gem "rails", "6.1.4"
Gemfile.lock
Gemfile.lockの中身は空で良いみたいなので、何も記述しません。
Dockerfile
クイックスタートの例文が古いみたいなので、少し変更を加えて書いてみました。 現時点でのrubyの最新版は3.0.2のようですね。
あとapt-getを記述している記事が多かったですが、調べてみるとaptが推奨のようでしたのでaptに変更しています。 それとクイックスタートの-qqについてはよくわかりませんでしたので省略しています。 さらに!raiils6からはwebpackerというのが必要らしいので、それに伴いyarnが必要とのことで内容をそれに合わせたものにしています。
#最新版のRuby
FROM ruby:3.0.2
# 必要なパッケージのインストール
RUN curl https://deb.nodesource.com/setup_12.x | bash
RUN curl https://dl.yarnpkg.com/debian/pubkey.gpg | apt-key add -
RUN echo "deb https://dl.yarnpkg.com/debian/ stable main" | tee /etc/apt/sources.list.d/yarn.list

RUN apt update && apt install -y nodejs yarn
RUN mkdir /myapp
WORKDIR /myapp
COPY Gemfile /myapp/Gemfile
COPY Gemfile.lock /myapp/Gemfile.lock
RUN bundle install
COPY . /myapp
docker-compose.yml
version: '3'

services:
  db:
    image: mysql:8.0.26
    environment:
      MYSQL_USER: takamori
      MYSQL_ROOT_PASSWORD: takamori
    ports:
      - "3306:3306"
    volumes:
      - data:/var/lib/mysql

  web:
    build: .
    command: "bundle exec rails s -p 3000 -b '0.0.0.0'"
    volumes:
      - .:/myapp/
    ports:
      - 3000:3000
    depends_on:
      - db

volumes:
  data:
それではDBをmysqlに指定して、railsをインストールしていきたいと思います。
docker-compose run web rails new . -f -d mysql
インストールできたのかな? Gemfileが更新され、以下のようになっています。
source 'https://rubygems.org'
git_source(:github) { |repo| "https://github.com/#{repo}.git" }

ruby '3.0.2'

# Bundle edge Rails instead: gem 'rails', github: 'rails/rails', branch: 'main'
gem 'rails', '~> 6.1.4', '>= 6.1.4.1'
# Use mysql as the database for Active Record
gem 'mysql2', '~> 0.5'
# Use Puma as the app server
gem 'puma', '~> 5.0'
# Use SCSS for stylesheets
gem 'sass-rails', '>= 6'
# Transpile app-like JavaScript. Read more: https://github.com/rails/webpacker
gem 'webpacker', '~> 5.0'
# Turbolinks makes navigating your web application faster. Read more: https://github.com/turbolinks/turbolinks
gem 'turbolinks', '~> 5'
# Build JSON APIs with ease. Read more: https://github.com/rails/jbuilder
gem 'jbuilder', '~> 2.7'
# Use Redis adapter to run Action Cable in production
# gem 'redis', '~> 4.0'
# Use Active Model has_secure_password
# gem 'bcrypt', '~> 3.1.7'

# Use Active Storage variant
# gem 'image_processing', '~> 1.2'

# Reduces boot times through caching; required in config/boot.rb
gem 'bootsnap', '>= 1.4.4', require: false

group :development, :test do
  # Call 'byebug' anywhere in the code to stop execution and get a debugger console
  gem 'byebug', platforms: [:mri, :mingw, :x64_mingw]
end

group :development do
  # Access an interactive console on exception pages or by calling 'console' anywhere in the code.
  gem 'web-console', '>= 4.1.0'
  # Display performance information such as SQL time and flame graphs for each request in your browser.
  # Can be configured to work on production as well see: https://github.com/MiniProfiler/rack-mini-profiler/blob/master/README.md
  gem 'rack-mini-profiler', '~> 2.0'
  gem 'listen', '~> 3.3'
  # Spring speeds up development by keeping your application running in the background. Read more: https://github.com/rails/spring
  gem 'spring'
end

group :test do
  # Adds support for Capybara system testing and selenium driver
  gem 'capybara', '>= 3.26'
  gem 'selenium-webdriver'
  # Easy installation and use of web drivers to run system tests with browsers
  gem 'webdrivers'
end

# Windows does not include zoneinfo files, so bundle the tzinfo-data gem
gem 'tzinfo-data', platforms: [:mingw, :mswin, :x64_mingw, :jruby]
Gemfileが更新されたので、この状態でビルドしていくようです。 それではビルドしていきましょう
docker-compose build
無事に終わればconfig/database.ymlを編集していきます。
# MySQL. Versions 5.5.8 and up are supported.
#
# Install the MySQL driver
#   gem install mysql2
#
# Ensure the MySQL gem is defined in your Gemfile
#   gem 'mysql2'
#
# And be sure to use new-style password hashing:
#   https://dev.mysql.com/doc/refman/5.7/en/password-hashing.html
#
default: &default
  adapter: mysql2
  encoding: utf8mb4
  pool: <%= ENV.fetch("RAILS_MAX_THREADS") { 5 } %>
  username: root
  password: takamori
  host: db

development:
  <<: *default
  database: myapp_development

# Warning: The database defined as "test" will be erased and
# re-generated from your development database when you run "rake".
# Do not set this db to the same as development or production.
test:
  <<: *default
  database: myapp_test

# As with config/credentials.yml, you never want to store sensitive information,
# like your database password, in your source code. If your source code is
# ever seen by anyone, they now have access to your database.
#
# Instead, provide the password or a full connection URL as an environment
# variable when you boot the app. For example:
#
#   DATABASE_URL="mysql2://myuser:mypass@localhost/somedatabase"
#
# If the connection URL is provided in the special DATABASE_URL environment
# variable, Rails will automatically merge its configuration values on top of
# the values provided in this file. Alternatively, you can specify a connection
# URL environment variable explicitly:
#
#   production:
#     url: <%= ENV['MY_APP_DATABASE_URL'] %>
#
# Read https://guides.rubyonrails.org/configuring.html#configuring-a-database
# for a full overview on how database connection configuration can be specified.
#
production:
  <<: *default
  database: myapp_production
  username: myapp
  password: <%= ENV['MYAPP_DATABASE_PASSWORD'] %>
少しわかりにくいですが、上のdefaultの項を変更しています。 この部分です。
default: &default
  adapter: mysql2
  encoding: utf8mb4
  pool: <%= ENV.fetch("RAILS_MAX_THREADS") { 5 } %>
  username: root
  password: takamori # docker-compo.ymlの値に変更
  host: db           # docker-compo.ymlの値に変更
この状態で
docker-compose up -d
すると
Restarting railsapp_web_1 ... done
Restarting railsapp_db_1  ... done
起動しましたね。
その後コンテナ内でdbをcreate?かな?
docker-compose exec web rails db:create
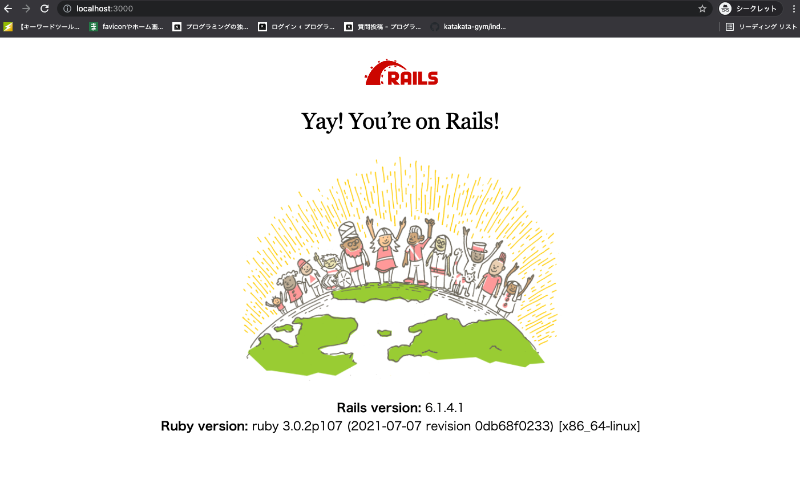
その後 http://localhost:3000 にアクセスします。

これでいけましたかね? railsの6系からは、webpackerというのが必要らしいので、これまで必要なかったyarnのinstallが要るみたいですね!
要注意!
何かあればコメント欄によろしくお願いします。


