アプリ開発を楽しむ【#3:環境構築2(ESLint+Prettier)】
前回までの記事 アプリ開発を楽しむ【#1:アプリの概要】 アプリ開発を楽しむ【#2:環境構築1(React+TypeScript)】
今回は、前回の環境構築の続きとなります。 ESLintとPrettierを導入していきます。 今回で環境構築を終えて、次回からReactでアプリをつくっていきたいと思います。
ESLintは、静的検証ツールです。 https://eslint.org/docs/latest/user-guide/getting-started
ESLint は、コードの一貫性を高め、バグを回避することを目的として、ECMAScript/JavaScript コードで見つかったパターンを特定して報告するためのツールです。
Prettierは、コードフォーマッターツールです。
それでは、導入していきます。 もし、togo_appのコンテナが起動していなければ、起動させておいてください。
docker compose up -d
そして、コンテナ内に入っておいてください。
docker compose exec frontend bash
1.ESLintの導入
①ESLintのインストール(コンテナ内で実行)
npm install eslint --save-dev
②ESLintの設定を始める(コンテナ内で実行)
npm init @eslint/config
対話形式となりますので次のように設定していきます。
Ok to proceed? → y

How would you like to use ESLint?
→ To check syntax, find problems, and enforce code styleを選択

What type of modules does your project use?
→ JavaScript modules (import/export)を選択

Which framework does your project use?
→ Reactを選択

Does your project use TypeScript?
→ Yesを選択

Where does your code run?
→ Browserを選択

Use a popular style guide
→ Use a popular style guideを選択

Which style guide do you want to follow?
→ Airbnb: https://github.com/airbnb/javascript(今回はAirbnbにしておきます。理由は特にありません。)

What format do you want your config file to be in?
→ JavaScriptを選択

Would you like to install them now?
→ Yesを選択

Which package manager do you want to use?
→ npmを選択(特に理由はありません。)
③AirbanbスタイルのTypeScript用の共有設定をインストール
style guideにAirbanbを選択したので、TypeScript用の共有設定をインストールしておきます。(コンテナ内で実行)
npm install eslint-config-airbnb-typescript --save-dev
④ESLintの基本設定
app/eslintrc.cjsを次のように設定します。
module.exports = {
  env: {
    browser: true,
    es2021: true,
  },
  extends: [
    'plugin:react/recommended',
    'airbnb',
    'airbnb/hooks',
    'plugin:import/errors',
    'plugin:import/warnings',
    'plugin:import/typescript',
    'plugin:@typescript-eslint/recommended',
    'plugin:@typescript-eslint/recommended-requiring-type-checking',
    'prettier',
  ],
  parser: '@typescript-eslint/parser',
  parserOptions: {
    ecmaFeatures: {
      jsx: true,
    },
    ecmaVersion: 'latest',
    sourceType: 'module',
    tsconfigRootDir: __dirname,
    project: ['./tsconfig.json'],
  },
  plugins: ['react', '@typescript-eslint'],
  ignorePatterns: ['.eslintrc.cjs'],
  rules: {
    'no-use-before-define': 'off',
    '@typescript-eslint/no-use-before-define': ['error'],
    'no-param-reassign': 0,
    'react/jsx-uses-react': 'off',
    'react/react-in-jsx-scope': 'off',
    'react/require-default-props': 'off',
    // 関数コンポーネントにアロー関数での宣言を適用
    'react/function-component-definition': [2, { namedComponents: 'arrow-function' }],
    // .tsxにjsxを書いてもよいようにする
    'react/jsx-filename-extension': [
      'error',
      {
        extensions: ['.js', '.jsx', '.ts', '.tsx'],
      },
    ],
    // js/jsx/ts/tsxファイルをimportするときに拡張子がなくてもよいようにする
    'import/extensions': [
      'error',
      'ignorePackages',
      {
        js: 'never',
        jsx: 'never',
        ts: 'never',
        tsx: 'never',
      },
    ],
  },
  settings: {
    'import/resolver': {
      node: {
        paths: ['src'],
        extensions: ['.js', '.jsx', '.ts', '.tsx'],
      },
    },
  },
};
ここでは、細かな設定の説明は割愛します。 (もしかしたら、後になって設定を変更するかもしれません。)
2.Prettierの導入
①prettierのインストール(コンテナ内で実行)
npm install --save-dev --save-exact prettier
②Prettierの設定
# prettierの設定ファイルを作成
echo {} > .prettierrc.json

# prettier用のignoreファイルを作成
touch .prettierignore
.prettierignoreのファイルの中は次のようにしておきます。
# Ignore artifacts:
build
.prettierrc.jsonのファイルの中は次のようにしておきます。
{
  "printWidth": 100,
  "trailingComma": "es5",
  "tabWidth": 2,
  "semi": true,
  "singleQuote": true,
  "endOfLine": "lf"
}
②eslint-config-prettierをインストール(コンテナ内で実行)
eslint-config-prettierはeslintとprettierで競合するルールをeslint上でオフにするツール
npm install eslint-config-prettier --save-dev
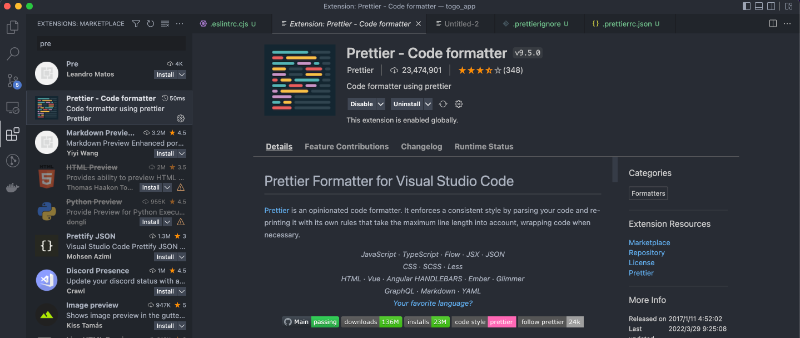
3.VsCodeのextensionのインストール
保存時に自動整形をできるように設定していきます。
①vscodeのextensionにPrettierがあるのでインストールしてください。
②.vscodeの作成
プロジェクトのルートに.vscodeディレクトリを作成し、その中にsettings.jsonファイルを作成します。 ディレクトリ構成
togo_app
    │
    ├── frontend
    |     |
    |     ├── app
    |     |
    │     └── Dockerfile
    |
    ├── .vscode
    │     └── settings.json
    |
    └── docker-compose.yml
スクリーンショットも載せておきます。

settings.jsonは次のようにします。
{
  "editor.defaultFormatter": "esbenp.prettier-vscode",
  "editor.formatOnSave": true
}
これで保存時にコードを整形してくれるようになるはずです。
これで環境構築は終わりになります。 次回からは、Reactでアプリをつくっていきます?
コードはGitHubに置いてありますのでよければ参考にしてください。 mainブランチは常に最新のものになります。 今回の内容はblog_3のブランチを参照してください。 https://github.com/KINE-M/togo_app