
アプリ開発を楽しむ【#17:投稿一覧ページ他をつくる】React+Redux+TypeScript
前回までの記事 アプリ開発を楽しむ【#1:アプリの概要】 アプリ開発を楽しむ【#2:環境構築1(React+TypeScript)】 アプリ開発を楽しむ【#3:環境構築2 (ESLint+Prettier)】 アプリ開発を楽しむ【#4:ヘッダー】 アプリ開発を楽しむ【#5:MyTogoList】 アプリ開発を楽しむ【#6:Reduxで状態管理1】 アプリ開発を楽しむ【#7:Reduxで状態管理2】 アプリ開発を楽しむ【#8:Google Map API】 アプリ開発を楽しむ【#9:新規追加モーダルUI(togo)】 アプリ開発を楽しむ【#10:Google Mapから座標を取得】 アプリ開発を楽しむ【#11:Togoの追加】 アプリ開発を楽しむ【#12:Togoの編集1】 アプリ開発を楽しむ【#13:Togoの編集2】 アプリ開発を楽しむ【#14:カスタムフック】 アプリ開発を楽しむ【#15:ルーティングの設定】 アプリ開発を楽しむ【#16:Mapページをつくる】
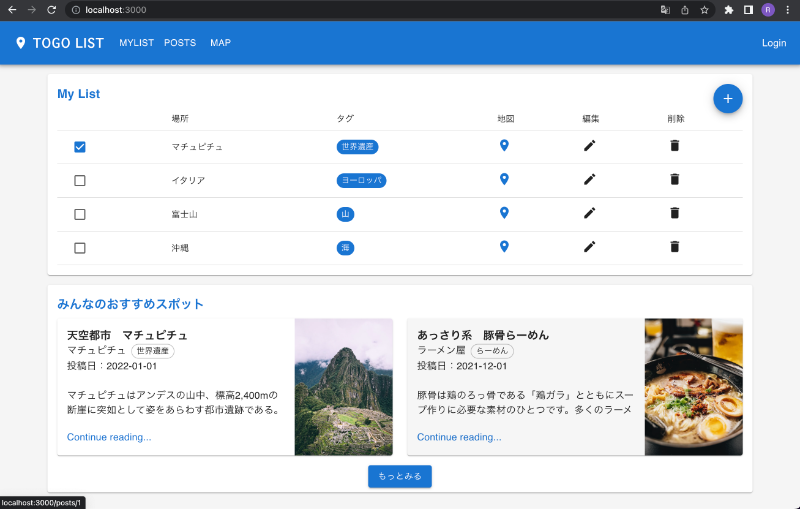
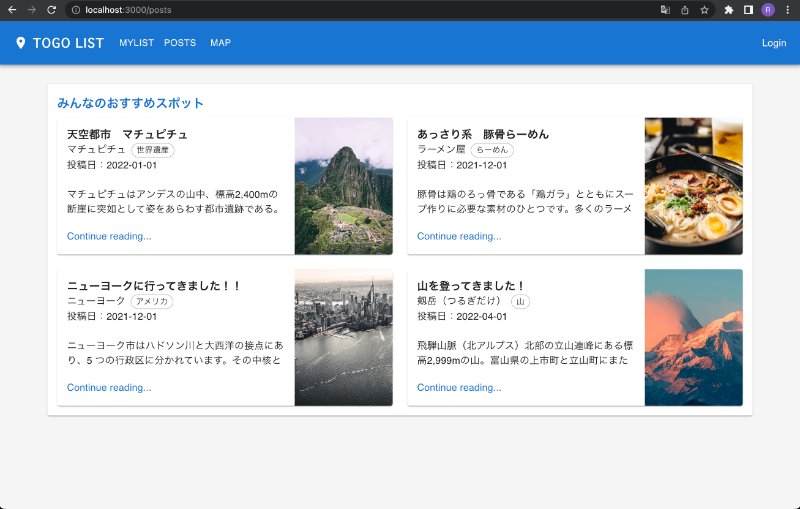
今回は、おすすめスポットとして投稿された記事を表示できるようにしていきたいと思います。
完成イメージは次のとおりです。
今回やること
- 投稿カードコンポーネントの作成
- 投稿一覧コンポーネントの作成
- Homeページに投稿一覧を表示
- postsページに投稿一覧を表示
1.投稿カードコンポーネントの作成
frontend/app/src/components/post/FeaturedPost.tsxを次のように作成します。
import React from 'react';
import {
  Card,
  CardActionArea,
  CardContent,
  CardMedia,
  Chip,
  Grid,
  Typography,
  Box,
} from '@mui/material';
import { useNavigate } from 'react-router-dom';
import type { Post } from '../../types/post';

interface FeaturedPostProps {
  post: Post;
}

const FeaturedPost: React.FC<FeaturedPostProps> = ({ post }) => {
  const navigate = useNavigate();

  return (
    <Grid item xs={12} md={6}>
      <CardActionArea onClick={() => navigate(`/posts/${Number(post.togo.id)}`)}>
        <Card sx={{ display: 'flex' }}>
          <CardContent sx={{ flex: 1 }}>
            <Typography component="h5" variant="h5" sx={{ fontSize: '18px', fontWeight: 'bold' }}>
              {post.title}
            </Typography>
            <Box component="div" sx={{ display: 'inline' }}>
              {post.togo.location}
            </Box>
            <Box component="div" sx={{ display: 'inline', ml: 1 }}>
              <Chip label={post.togo.tag} variant="outlined" size="small" />
            </Box>
            <Box component="div" sx={{ display: 'flex' }}>
              投稿日:{post.publishedAt}
            </Box>
            <Typography variant="inherit" paragraph sx={{ height: 40, overflow: 'hidden', mt: 2 }}>
              {post.description}
            </Typography>
            <Typography variant="subtitle1" color="primary">
              Continue reading...
            </Typography>
          </CardContent>
          <CardMedia
            component="img"
            sx={{ width: 160, display: { xs: 'none', sm: 'block' } }}
            image={post.image}
            alt={post.title}
          />
        </Card>
      </CardActionArea>
    </Grid>
  );
};

export default FeaturedPos
2.投稿一覧コンポーネントの作成
frontend/app/src/components/post/Posts.tsxを次のように作成します。
import React, { useEffect } from 'react';
import { useDispatch, useSelector } from 'react-redux';
import { useNavigate } from 'react-router-dom';
import { Box, Button, Grid, Typography } from '@mui/material';
import { getPostList, initialState } from '../../redux/postSlice';
import { RootState } from '../../redux/store';
import FeaturedPost from './FeaturedPost';
import samplePostList from '../../sampleData/posts';

type PostsProps = {
  count?: number;
};

const Posts: React.FC<PostsProps> = ({ count }) => {
  const navigate = useNavigate();
  const dispatch = useDispatch();
  const { postList } = useSelector((state: RootState) => state.post || initialState);

  useEffect(() => {
    if (count) {
      dispatch(getPostList(samplePostList.slice(0, count)));
    } else {
      dispatch(getPostList(samplePostList));
    }
  }, [dispatch]);

  if (!postList.length) {
    return (
      <Box sx={{ p: 2, display: 'flex', flexDirection: 'column' }}>
        <Typography
          component="h2"
          variant="h6"
          color="primary"
          gutterBottom
          sx={{ fontWeight: 'bold' }}
        >
          みんなのおすすめスポット
        </Typography>
        <Typography variant="body1">投稿された記事はありません。</Typography>
      </Box>
    );
  }

  return (
    <>
      <Box sx={{ p: 2, display: 'flex', flexDirection: 'column' }}>
        <Typography
          component="h2"
          variant="h6"
          color="primary"
          gutterBottom
          sx={{ fontWeight: 'bold' }}
        >
          みんなのおすすめスポット
        </Typography>
        <Grid container spacing={3}>
          {postList.map((post) => (
            <FeaturedPost post={post} key={post.togo.id} />
          ))}
        </Grid>
      </Box>
      {count && (
        <Box sx={{ pb: 1, display: 'flex', justifyContent: 'center' }}>
          <Button variant="contained" onClick={() => navigate('/posts')}>
            もっとみる
          </Button>
        </Box>
      )}
    </>
  );
};

export default Posts;
propsとしてcountを受け取るようにして、その数だけの投稿を取得できるようにしています。(countに値がなければすべての投稿を取得) Homeページでは、すべての投稿を表示するのではなく、2つの投稿のみを表示するようにして、もっとみるボタンから投稿一覧ページ誘導するように考えています。
3.Homeページに投稿一覧を表示
frontend/app/src/components/Home.tsxを次のように修正します。
import { Container, Paper } from '@mui/material';
import MyTogoList from './togo/MyTogoList';

// ここから追加
import Posts from './post/Posts';
// ここまで追加

const Home = () => (
  <Container maxWidth="lg" sx={{ pt: 2 }}>
    <Paper sx={{ p: 2, display: 'flex', flexDirection: 'column', position: 'relative' }}>
      <MyTogoList />
    </Paper>

    // ここから追加
    <Paper sx={{ mt: 2 }}>
      <Posts count={2} />
    </Paper>
    // ここまで追加

  </Container>
);

export default Home;
4.postsページに投稿一覧を表示
frontend/app/src/components/AllPost.tsxを次のように修正します。
// ここから修正
import { Container, Paper } from '@mui/material';
// ここまで修正

// ここから追加
import Posts from './post/Posts';
// ここまで追加

const AllPosts = () => (
  <Container maxWidth="lg" sx={{ pt: 2 }}>

    // ここから削除
    All Posts
    // ここまで削除

    // ここから追加
    <Paper sx={{ mt: 2 }}>
      <Posts />
    </Paper>
    // ここから追加

  </Container>
);

export default AllPosts;
今回はここまでです。次回は、投稿詳細ページをつくっていきます。
コードはGitHubに置いてありますのでよければ参考にしてください。 mainブランチは常に最新のものになります。 今回の内容はblog_17のブランチを参照してください。 https://github.com/KINE-M/togo_app

タカモリ
めちゃできてる!笑 凄い!